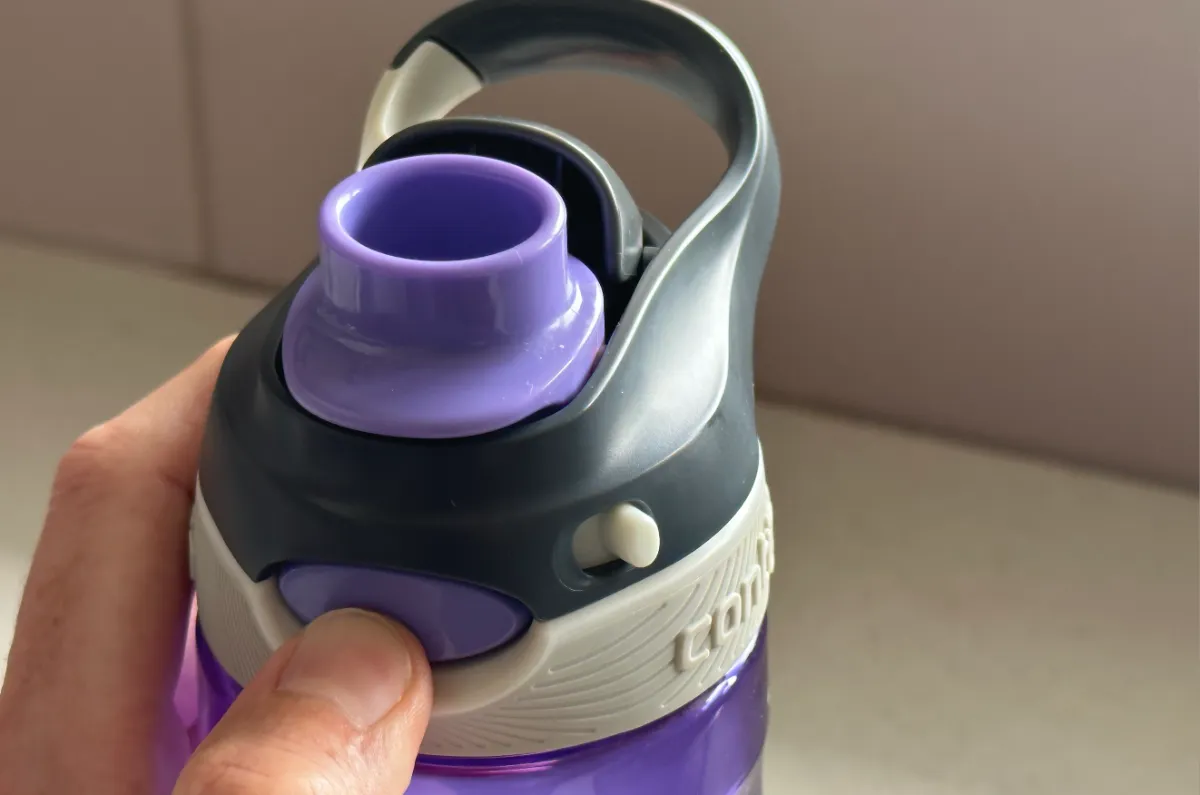
You can safely pull apart the lid on your Contigo water bottle. This process feels simple once you know the steps. Take your time and follow each instruction. You do not need special skills. Just pay attention as you work so you do not lose any small pieces.
What Tools Do You Need for the Cleaning Process?
Simple Household Supplies for Effective Cleaning
You do not need fancy gadgets to clean your Contigo AutoSpout lid. Most of the supplies you need are probably already in your kitchen. Let’s break down what works best for a deep clean.
Warm soapy water solution
Start with a bowl or sink filled with warm water and a few drops of dish soap. This simple mix helps loosen grime and break down oils. You can soak the lid parts in this solution for a few minutes. Warm soapy water works wonders on sticky residue and everyday dirt.
Soft-bristled brushes and cotton swabs
A soft-bristled brush, like a baby bottle brush or an old toothbrush, helps you reach into tight spots. You can use cotton swabs for the small crevices and around the button mechanism. These tools let you scrub away buildup without scratching the plastic.
Clean rinsing water and drying cloth
After scrubbing, rinse every part under clean running water. Make sure you remove all soap and debris. Use a lint-free cloth or paper towel to dry each piece. Air drying on a clean towel also works well. Dry parts help prevent mold and keep your lid fresh.
Tool | Purpose |
|---|---|
Warm soapy water | Loosens grime and residue |
Soft brushes/swabs | Cleans hard-to-reach areas |
Rinsing water/cloth | Removes soap, dries components |
With these simple tools, you can keep your contigo water bottle clean and ready for daily use.
How Do You Safely Pull Apart the Contigo AutoSpout Lid?
Step-by-Step Disassembly Guide
Ready to clean your Contigo water bottle lid? You can do this at home with a few simple tools. Follow these steps to make sure you don’t miss anything.
Step 1: Remove the straw
Begin by taking the lid off the bottle. Then, locate the straw underneath and gently unscrew it in a counterclockwise direction. The straw should detach easily without requiring force.
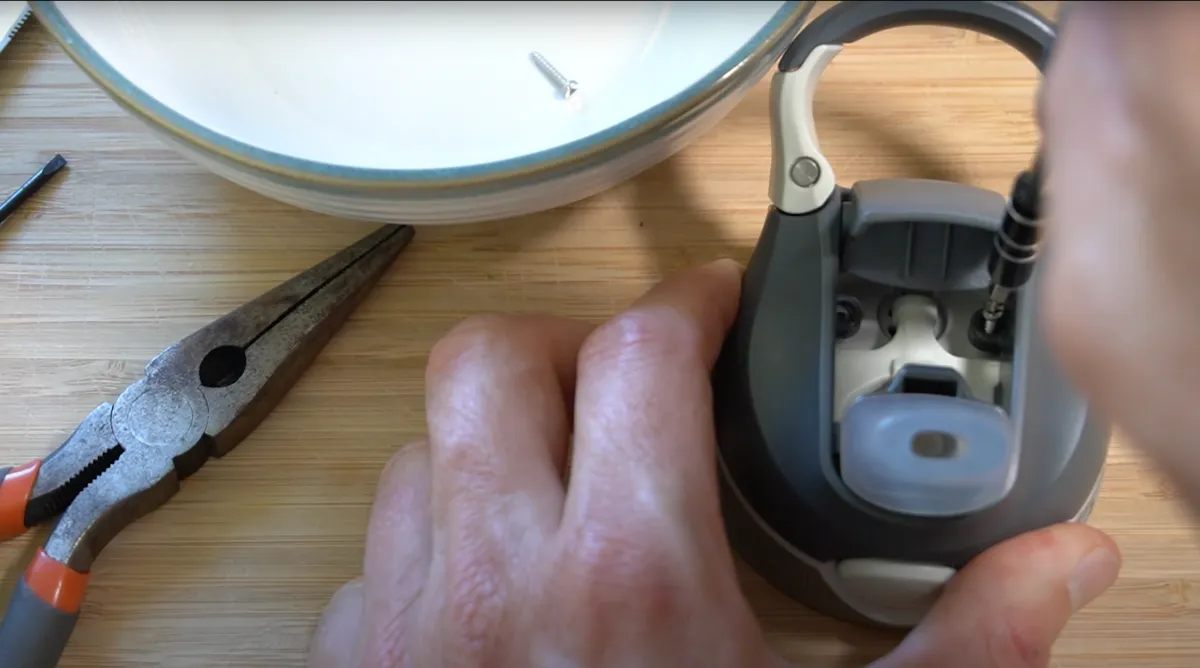
Step 2: Unscrew the two triangle screws on the lid
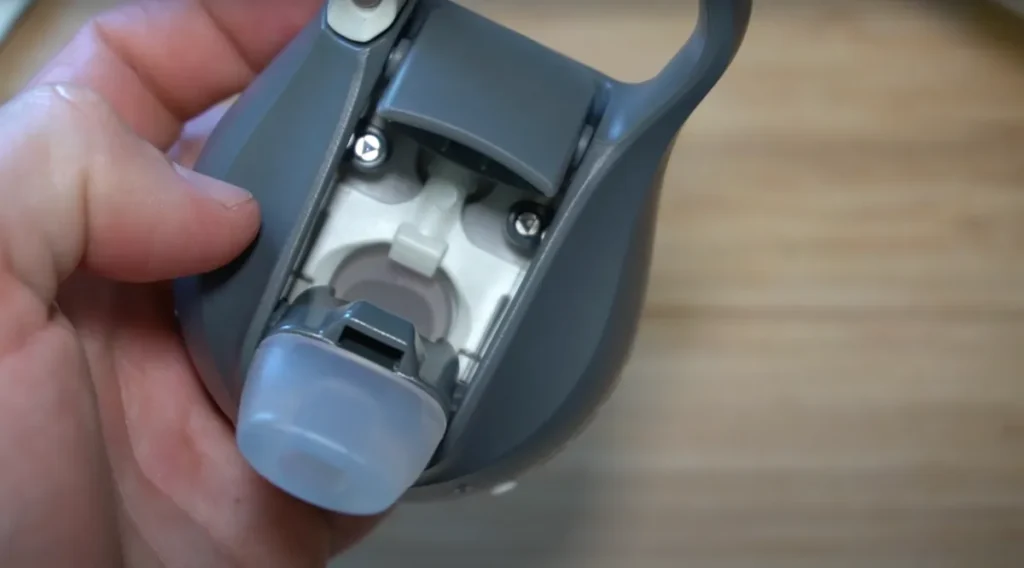
Flip open the drinking spout to reveal two triangle-shaped screws positioned on the top part of the lid. Use a 1.8mm triangle screwdriver to carefully remove both screws. Place them in a small bowl or container so they aren’t lost during cleaning.
Step 3: Separate the top section from the bottom section of the lid
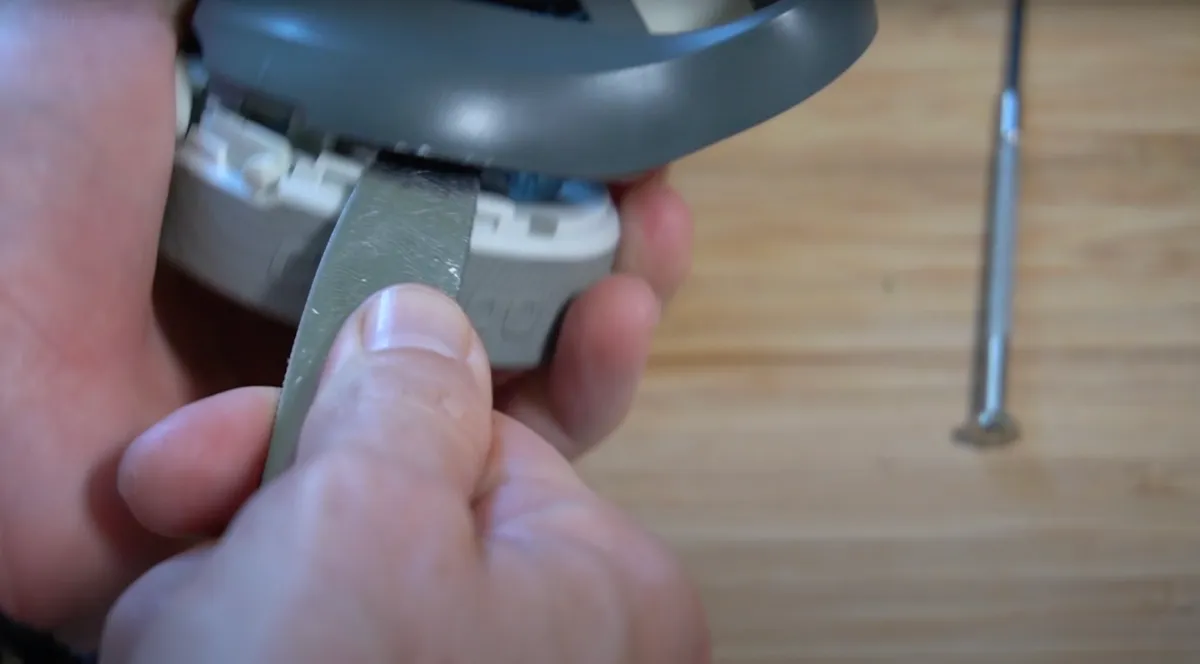
The top and bottom parts of the lid are secured on both sides by small plastic tabs situated beside the locking mechanism. Carefully insert a butter knife between the two sections and gently twist to release one side. The opposite side should come apart easily afterward.
Step 4: Remove the push-button and locking mechanism
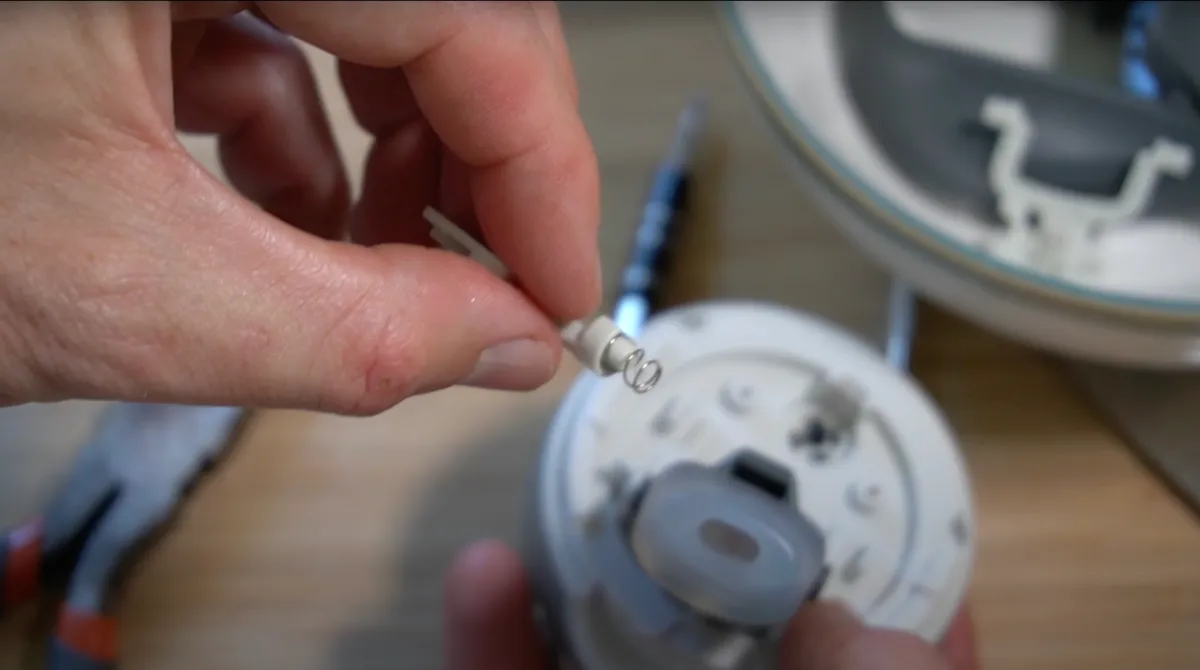
Take out the entire locking mechanism along with the push-button assembly. Exercise caution here—these components include two small parts, each with delicate springs that can easily spring out and get lost if handled roughly.
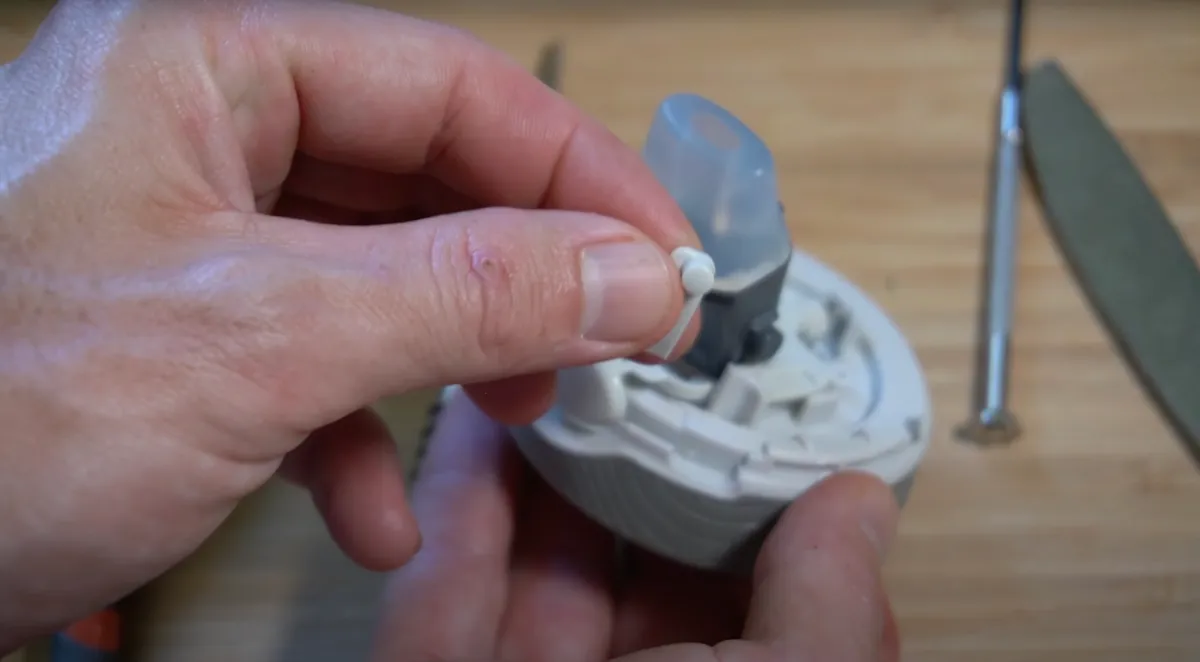
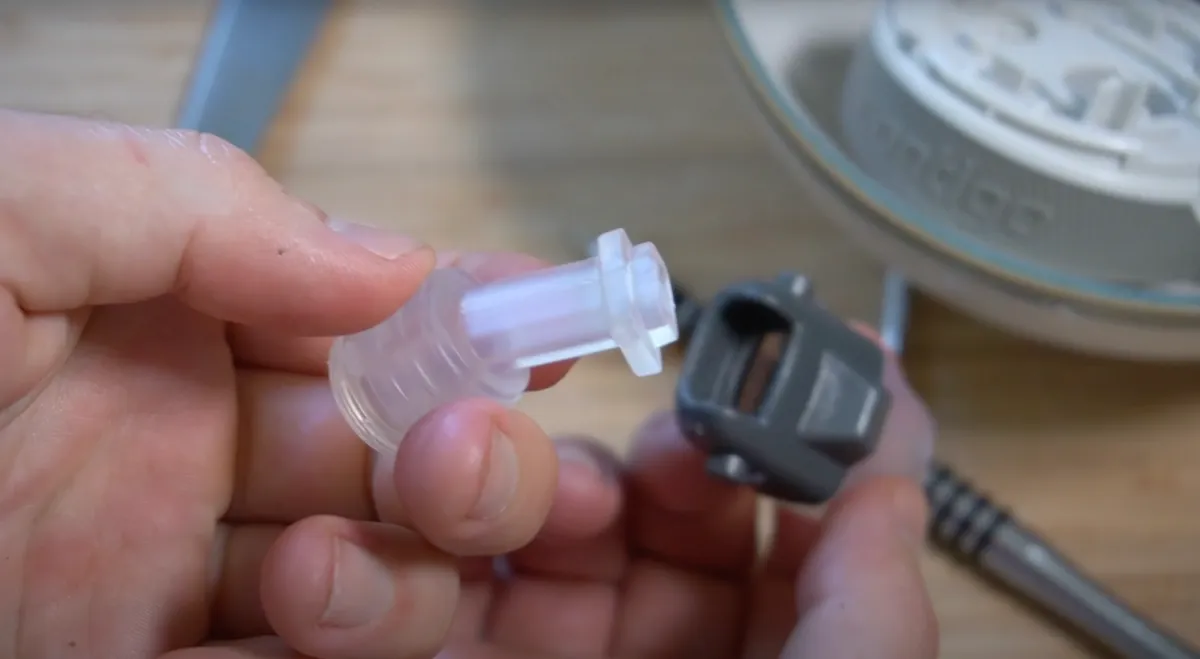
Step 5: Push the silicone spout out from the underside
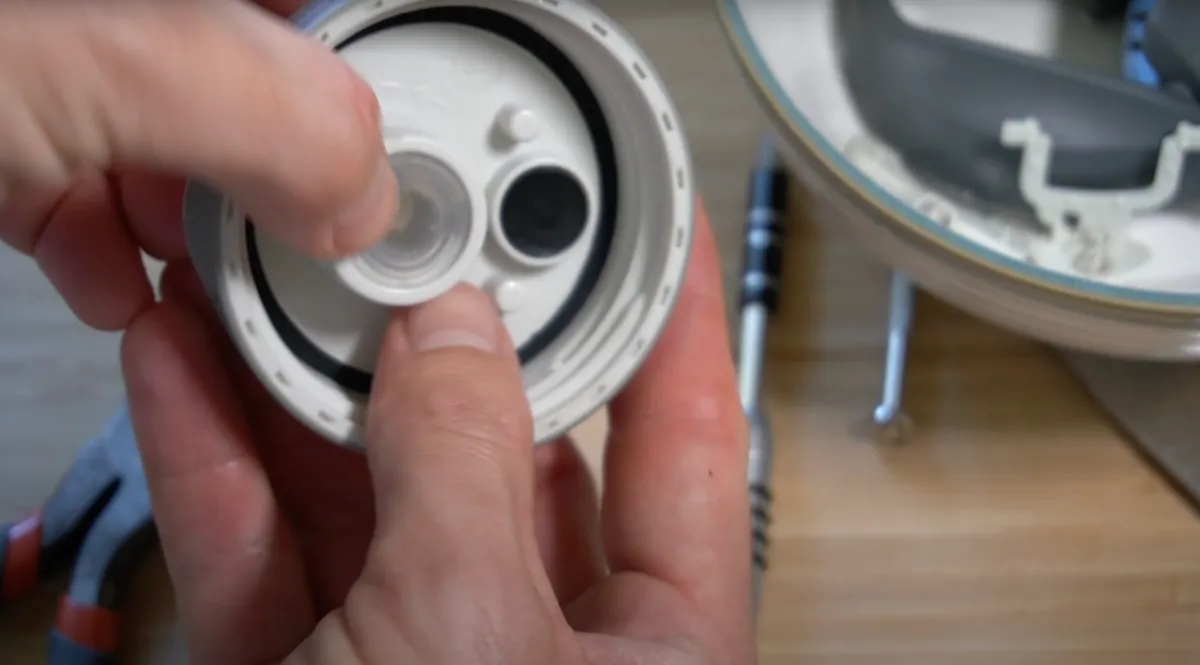
Place your finger under the lid and push firmly against the silicone spout from below. It should dislodge and pop out through the top without resistance.
Step 6: Pull out the one-way air valve
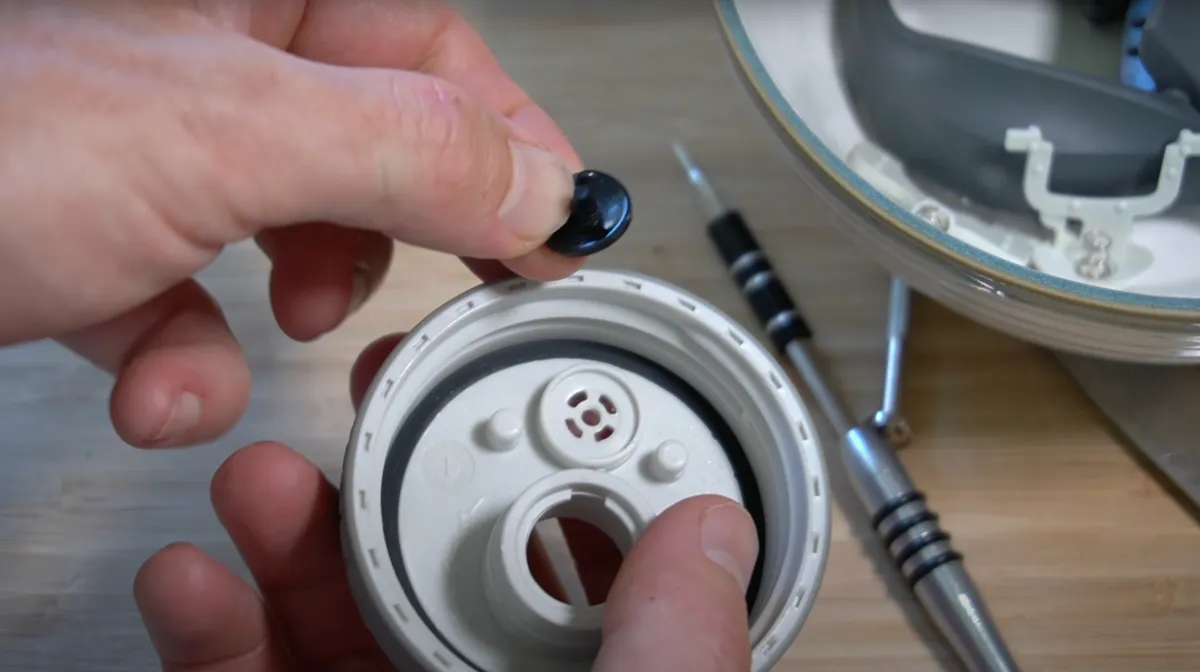
Pinch the one-way air valve between your fingers and pull straight out. It is designed to be removed easily by hand.
Step 7: Remove the rubber gasket
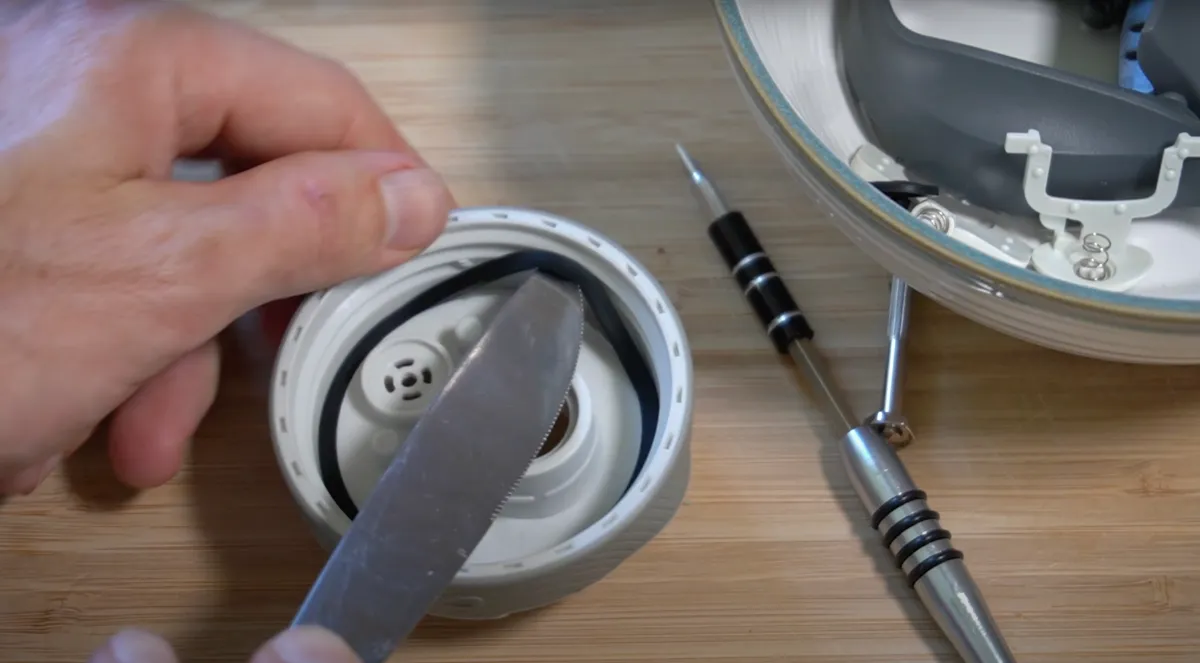
The rubber gasket is a common area for mold buildup. Slide a butter knife under the edge of the gasket to lift it slightly, then grasp and pull it out completely for cleaning.
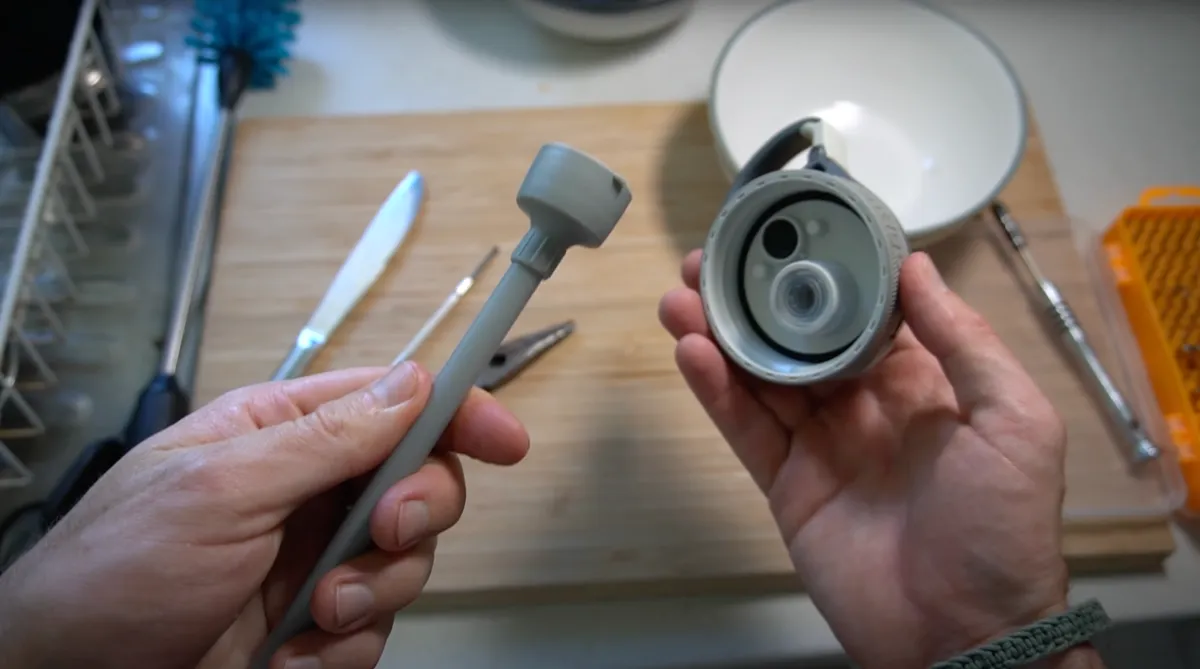
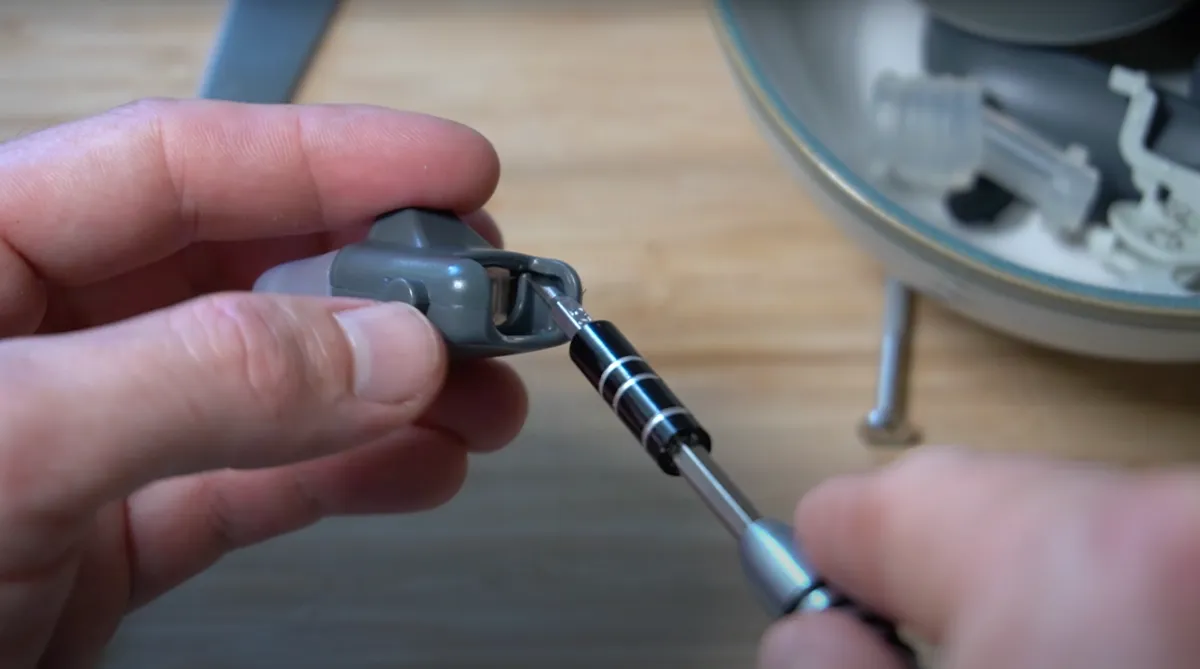
Step 8: Disassemble the drinking spout
This is often the most difficult step. First, pull the base section of the spout away from the upper section—it should detach with moderate effort. Then, use a small flathead screwdriver to carefully pry open the plastic tabs holding the internal components together. This requires patience and a gentle touch to avoid damaging the parts.
Step 9: Soak and clean all parts to eliminate mold
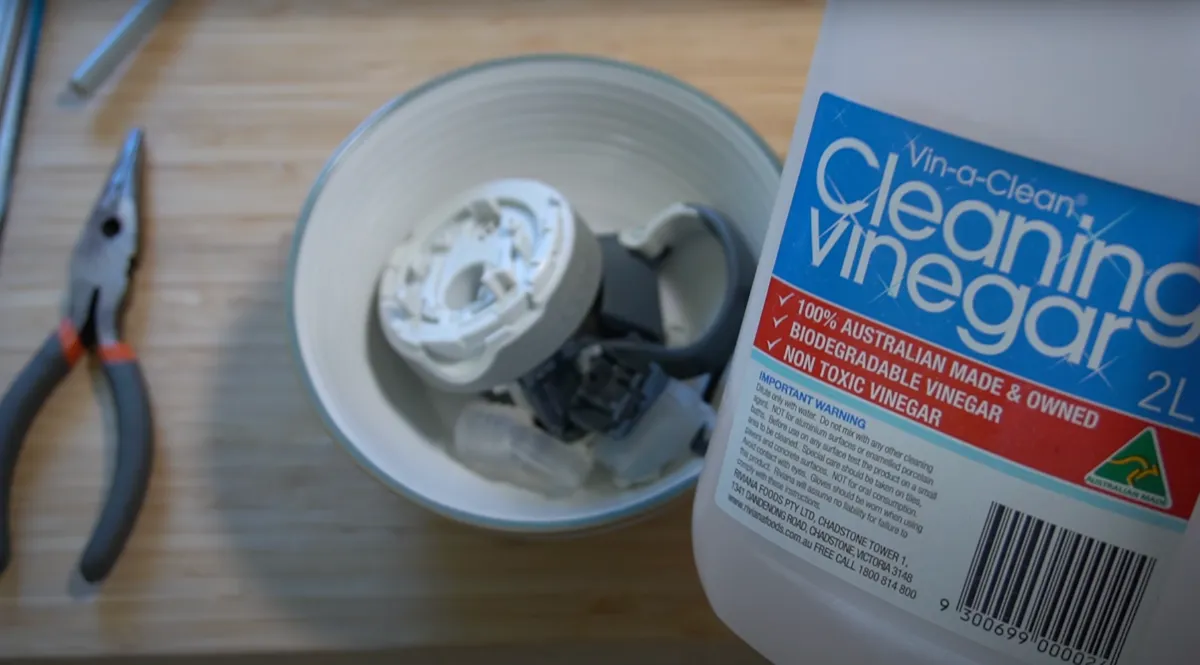
Submerge all disassembled parts in a solution made of equal parts white vinegar and water. Allow them to soak for at least 30–60 minutes; for severe mold, leave overnight. Use a soft bottle brush to thoroughly scrub every component, paying special attention to crevices.
Step 10: Dry all parts completely
After cleaning, lay out all parts on a clean towel and allow them to air-dry fully before attempting reassembly. Any residual moisture can promote mold regrowth.Here’s a quick look at common mistakes and how to avoid them:
Mistake | Solution |
|---|---|
Using incorrect screwdriver sizes | Use a 2mm Tri-Wing or suitable screwdriver. |
Not storing small parts properly | Keep tiny parts in a container or saucer. |
Applying excessive force during disassembly | Pry gently with a butter knife—never force sections apart. |
What’s the Best Way to Clean All Components?
Thorough Cleaning Techniques for Each Part
Soaking and scrubbing plastic components
You want your Contigo lid to look and feel fresh. Start by placing all plastic parts in a bowl of warm, soapy water. Let them soak for about 10 minutes. This step loosens sticky residue and helps break down any grime. After soaking, grab a soft sponge or cloth. Gently scrub each piece, paying attention to corners and edges. You don’t need to use much force. If you see stubborn spots, dip your sponge in a bit of baking soda for extra cleaning power.
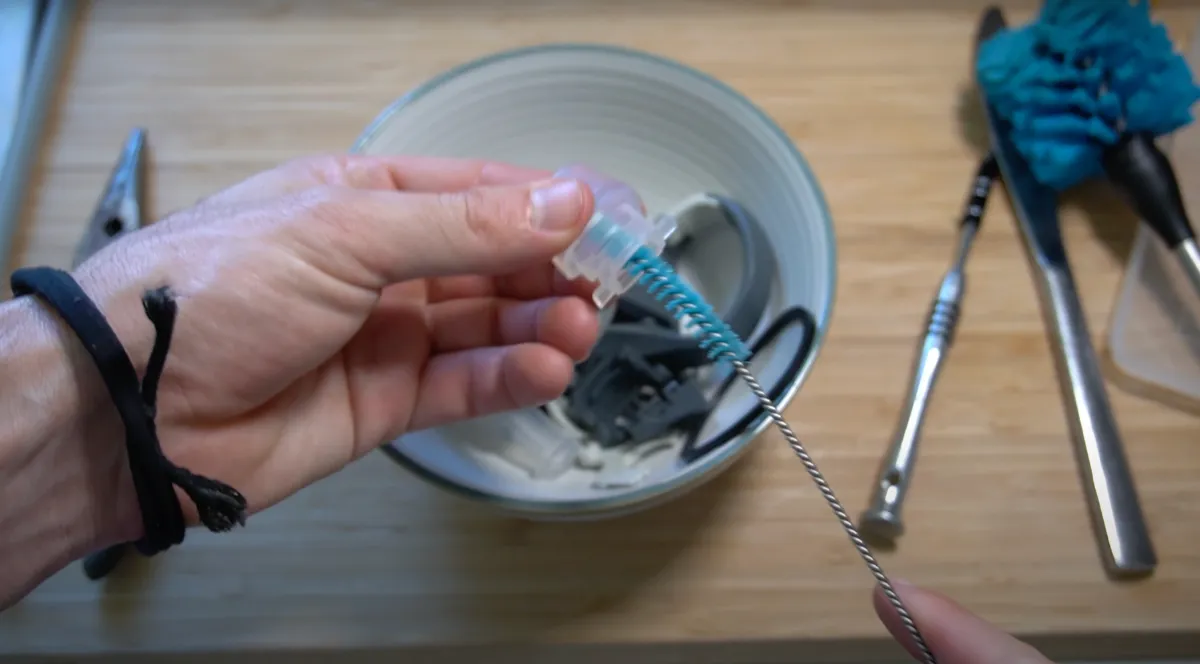
Cleaning intricate mechanisms with brushes
Some parts of your lid have tiny spaces where dirt hides. Use a soft-bristled brush, like a baby bottle brush or an old toothbrush. Move the brush in small circles around the button, spout, and seal areas. Cotton swabs work great for reaching into narrow gaps. You can clean the spring and button mechanism with gentle strokes. Don’t rush this part. Take your time and check for any leftover grime.
Tool | Best Use |
|---|---|
Toothbrush | Button and spout areas |
Cotton swab | Tight crevices |
Bottle brush | Inside lid |
Rinsing and drying procedures
Once you finish scrubbing, rinse every piece under clean running water. Make sure you remove all soap and cleaning agents. Lay the parts on a clean towel to air dry. You can also pat them dry with a lint-free cloth. Wait until everything feels completely dry before you put the lid back together. Dry parts help prevent mold and keep your water tasting fresh.
How Do You Reassemble Your Contigo Lid Correctly?
Step-by-Step Reassembly Instructions
Ready to put everything back together? You can do this in just a few minutes. Let’s walk through each step so your Contigo bottle works like new.
Step 1: Replacing the silicone seal
Start with the silicone seal. Hold it gently and check for any twists or damage. Place the seal back into its groove. Make sure it sits flat and snug. If you see a metal ring, slide it in right after the seal. This helps prevent leaks and keeps your drinks safe.
Step 2: Reinstalling the button assembly
Next, grab the button assembly. Align it with the slot inside the lid. Push it in until it fits securely. You might need to wiggle it a little. Use your fingers to guide the button into place. If it feels loose, double-check the alignment.
Step 3: Snapping the spout back into place
Now, take the spout and line it up with the opening. Press down firmly. You should hear a satisfying click. That sound means the spout is locked in and ready for action. If you don’t hear the click, try pressing again or check for any misaligned parts.
The importance of the “click” sound
The click is more than just a noise. It tells you that the lid is assembled correctly. Without it, you might notice leaks or a spout that won’t open. Always listen for the click before you finish. If you miss it, go back and check each part.
How Can You Test and Troubleshoot After Reassembly?
Ensuring Proper Function and Leak-Proof Performance
Performing a dry function test
You just put your Contigo lid back together. Now, you want to make sure everything works. Start with a dry function test. Press the button and watch the spout pop up. Does it move smoothly? Try locking and unlocking the safety switch. If the spout opens and closes without sticking, you did a great job!
Tip: If the button feels stiff, check for misaligned parts or leftover debris.
Conducting a leak test before use
Next, fill your bottle with water. Close the lid tightly. Hold the bottle upside down over the sink. Give it a gentle shake. Look for any drips or leaks around the spout and seal. If you see water escaping, stop and inspect the silicone seal. Sometimes, a seal needs to be repositioned.
No leaks? You’re ready to use your bottle.
Small drips? Try reseating the seal and testing again.
Test Step | What to Check |
|---|---|
Button Press | Spout pops up easily |
Safety Lock | Locks and unlocks smoothly |
Leak Test | No water escapes |
Troubleshooting common issues
You might run into a few problems. If the spout won’t open, double-check the button assembly. If you spot leaks, make sure the silicone seal sits flat. Sometimes, a part needs a gentle push to snap into place.
Where Can You Find Professional Water Bottle Manufacturing?
Anhui iFun’s Expertise in Hydration Solutions
Our manufacturing capabilities
If you want a water bottle that stands out, you should know what makes Anhui iFun different. You get more than just a bottle. You get a product shaped by advanced technology and careful attention to detail.
Advanced automation keeps production fast and consistent.
Strict quality control checks every stage, so you know your bottle meets high standards.
You can customize your order with special molding, printing, or packaging.
Precision matters from the first material choice to the final inspection.
Large production capacity means you get your order quickly.
You see the results in every bottle. The process makes sure you get a reliable product every time.
Quality and design philosophy
Anhui iFun believes that quality starts with the basics. You get bottles made from safe, durable materials. The design team focuses on both function and style. You can choose features that fit your needs, like easy-to-clean lids or unique colors. Every bottle goes through careful testing before it reaches you. This commitment to quality means your bottle lasts longer and works better.
Why choose a professional manufacturer
You might wonder why you should pick a professional manufacturer instead of a generic brand.
Promotional products with practical utility generate nearly 85% higher brand recall than traditional advertising methods. Functional items like water bottles remain in use, creating ongoing brand impressions long after distribution.
The standout LARQ product is the LARQ Bottle PureVis—a self-cleaning bottle with plant-based filters to purify your water and improve the taste. Ideal for corporate gifting, premium quality, and innovative self-cleaning and purifying technology (PureVis) eliminate up to 99% of bio-contaminants such as E. coli.
When you choose a professional manufacturer, you get products that help your brand stand out and deliver real value to users. You also get peace of mind knowing your bottle is safe, stylish, and built to last.
You can pull apart and reassemble your lid with confidence.
Follow each step for best results and regular cleaning.
Careful handling keeps your contigo water bottle working longer.
If you run into trouble, reach out to Contigo support for help.
FAQ
How often should you deep clean your Contigo AutoSpout lid?
You should deep clean your lid every week. If you use your bottle daily, clean it more often to keep everything fresh.
Tip: Set a reminder on your phone! 🕒
Can you put the Contigo AutoSpout lid in the dishwasher?
Yes, you can place the lid on the top rack of your dishwasher. Always check your user manual for specific instructions.
Lid Part | Dishwasher Safe? |
|---|---|
Main Lid | ✅ |
Silicone Seal | ✅ |
Button Assembly | ✅ |
What should you do if you lose a small part during cleaning?
Contact Contigo support for replacement parts. You can also check their website for spare pieces.
Note: Keep all parts in a small bowl while cleaning to avoid losing them.
