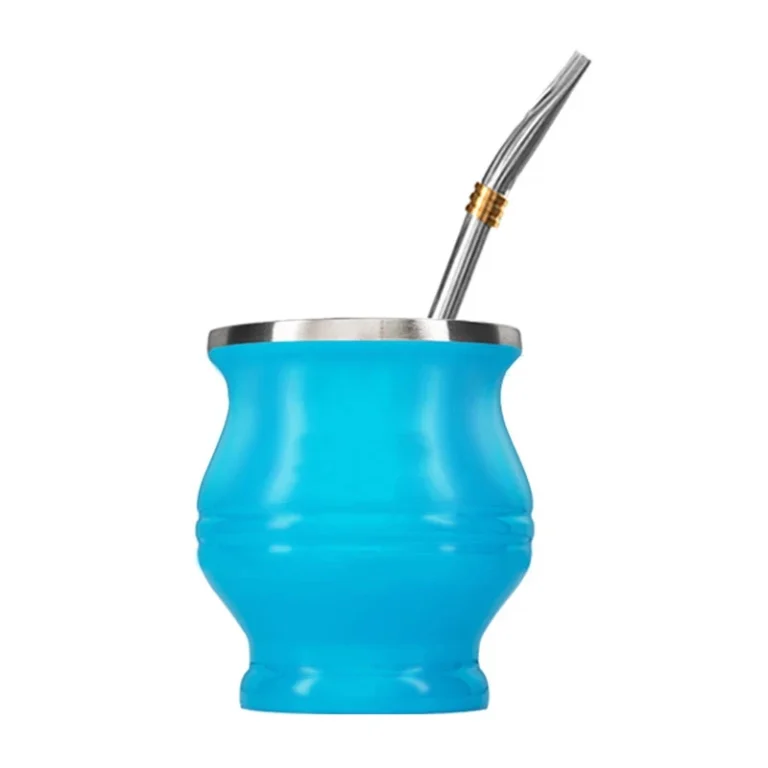
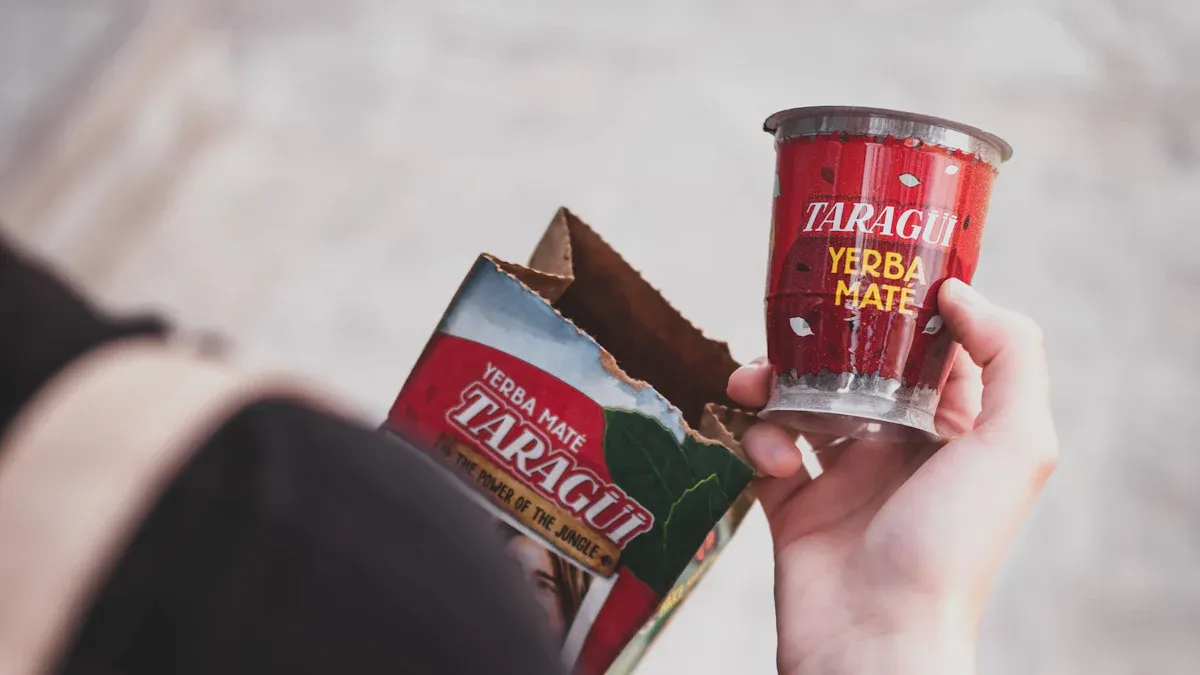
Ever think about how to customize your own yerba mate cup: MOQ? Design and packaging are crucial if you want it to be special. You can use laser engraving to make it unique. Additionally, you can select packaging that transforms your cup into a fantastic gift. Many people enjoy showcasing their heritage with custom drinkware. Some incorporate sun symbols or nature patterns to feel connected to tradition. Here are some common minimum order quantities for custom yerba mate cups:
|
Supplier |
Product Description |
|
|---|---|---|
|
Soniu |
Double Wall stainless steel Insulation Yerba Mate cup 230ml |
1000 bottles |
|
Alibaba |
Customized Yerba Mate Cup with Lid and Bombilla Straws |
50 pieces |
You will need to choose materials, design, and packaging. This is especially important if you want cups for gifts or to represent your brand.
Key Takeaways
-
Learn about MOQ to see how many cups you can buy.
-
Pick the best material for your cup. It changes how strong your cup is and how you can make it special.
-
Think about laser engraving for a cool and lasting look. You can use it on stainless steel, wood, or ceramic cups.
-
Try digital printing for small orders. This lets you test designs without spending a lot of money first.
-
Choose packaging that makes your cup look better. Good packaging helps if you want to give it as a gift or sell it in stores.
-
Add your own style with colors, patterns, and symbols. These show your personality or where you come from.
-
Make a budget and include all costs. Remember the base price, customization, and shipping.
-
Always ask for a sample before making many cups. This helps you check if your design is what you want.
How to Customize Your Own Yerba Mate Cup: MOQ Explained
MOQ Basics
If you want to make your own yerba mate cup, you need to know about MOQ. MOQ means Minimum Order Quantity. This is the smallest number of cups you can order from a factory. Factories use MOQs to pay for making the cups and not lose money. Some factories let you order as few as 25 plastic cups. Others want you to buy 1,000 stainless steel cups if they have special features. Always ask about the MOQ before you start your project. This helps you see if you can afford it and if it works for you.
Tip: Ask about the MOQ before you design your cup. This will help you save time and avoid problems.
Factors Affecting MOQ
Many things can change the MOQ for yerba mate cups. The size of the factory, how many cups they can make, and their quality rules all matter.
|
Factor |
Description |
|---|---|
|
MOQ Variability |
Small factories might take orders for 5,000 cups, but big ones may want 50,000 or more. |
|
Production Capacity |
Big factories can make more cups at once. |
|
Compliance Certifications |
Factories with food safety certificates are better. |
|
Quality Control Systems |
Good checks and moisture control are important for yerba mate cups. |
Material and Production
The material and how the cup is made also change the MOQ. Some materials need special machines or extra work, so you have to order more. Here are some common materials:
|
Bottle Type |
Typical MOQ |
Durability |
Customisation Options |
Best Use Case |
|---|---|---|---|---|
|
Stainless Steel |
50–100 units |
Excellent |
Laser engraving, pad printing, color coating |
Corporate gifts, branding |
|
Plastic |
25–50 units |
Fair |
Full-color printing, logo branding, translucent effects |
Events, giveaways |
|
Glass |
50 units |
Good (with sleeve) |
Vinyl wraps, etching, sleeve branding |
Eco-brands, wellness, gifting |
If you want a stainless steel cup with laser engraving, you will need to order at least 50 cups. Plastic cups can have a lower MOQ, but they do not last as long.
Setup and Printing Costs
Setup and printing also change the MOQ. If your design is hard or needs special printing, the factory has to get machines ready. This takes time and costs money. Factories ask for bigger orders to cover these costs. If you pick a simple design or a normal shape, you can order fewer cups.
Reducing MOQ
You might want to know how to order fewer cups. There are some smart ways to get a smaller order.
Standard Designs
Factories have standard shapes and colors that do not need new tools. If you pick these, you can order less. This is good for small businesses or gifts.
Digital Printing Options
Digital printing lets you put your design on a cup without big setup costs. Some factories let you order just one cup. You can try your ideas with no big order. You also get clear prices and discounts if you buy more. For example, you can save up to 25% if you buy 50 cups.
|
Feature |
Benefit |
|---|---|
|
No minimum orders |
Try your design on one cup. |
|
Volume discounts available |
Save up to 25% if you buy 50 cups. |
|
Clear pricing tiers |
Helps you plan your profits. |
-
Printdoors lets you order any amount and helps you make more money with flexible orders.
-
Customizing cups turns plain drinkware into something special for your brand.
If you want to make yerba mate cups for a small event or a new brand, digital printing is a good idea. You can start with one cup and order more as you grow.
Note: Digital printing and standard designs help you start small and grow your project.
Choosing Materials for Customized Drinkware
When you want to make your own yerba mate cup, you have to pick a material. The material changes how your cup looks and feels. It also affects how you use it every day. You should choose one that fits your style and what you need. Let’s look at some popular materials and see how they work for making custom cups.
Popular Materials
Stainless Steel
Stainless steel is strong and easy to clean. It is good if you want a cup that lasts a long time. It keeps drinks hot or cold. You can use laser engraving on it. Many companies use stainless steel for gifts because it looks nice and modern.
Wood
Wood makes your cup feel old-fashioned. It gets a special look as you use it. It feels warm when you hold it. You have to dry wooden cups carefully. They can soak up flavors. You cannot wash them in a dishwasher. But wood is good for the planet and lets you make cool designs.
Ceramic
Ceramic cups look classic and come in many colors and shapes. They keep drinks warm and do not soak up flavors. Ceramic can break easily and is heavy. You need to be careful with them. You can paint them by hand or use UV printing for designs.
Leather
Leather cups look different and keep drinks warm. They are not common and cost more money. You need to take care of leather to keep it soft. Leather cups are great for special parties and make nice gifts.
Tip: Pick a material that works for your daily life and shows who you are.
Here is a table that shows the good and bad things about each material:
|
Material |
Advantages |
Limitations |
|---|---|---|
|
Wooden |
Keeps drinks warm, gets a cool look, good for the earth, special designs |
Needs careful drying, soaks up flavors, not for dishwashers |
|
Metal |
Strong, easy to clean, safe |
Does not keep heat well, can change taste, not a classic look |
|
Leather |
Keeps drinks warm, looks special |
Hard to find, costs more, needs care, not always easy to get |
|
Ceramic |
Does not soak up flavors, keeps drinks hot, lots of designs |
Breaks easily, heavy, can crack if too hot or cold |
Material Suitability for Customization
Laser Engraving Compatibility
You want your cup to look special. Stainless steel, wood, and ceramic are all good for laser engraving. Stainless steel gives clear lines. Wood looks old and cool. Ceramic lets you add color with painting or UV printing. Silicone-lined gourds can also be engraved.
|
Material |
|
|---|---|
|
Stainless Steel |
Yes |
|
Ceramic |
Yes (hand-painted or UV-printed) |
|
Wood (Palo Santo, Algarrobo) |
Yes |
|
Silicone-lined Gourds |
Yes |
Printing and Embossing
Printing and embossing let you put names, logos, or patterns on your cup. Stainless steel works for screen printing and laser engraving. Ceramic can have screen printing and UV designs. Wood can be engraved or embossed. Glass can be used for sublimation and laser engraving, but it can break easily.
The material you pick changes how your cup looks and how long it lasts. Stainless steel and glass are strong and easy to clean. Wood feels classic but needs more care. Ceramic gives you lots of design choices but can break. Eco-friendly materials are good for the earth and help people.
|
Material |
Pros |
Cons |
|---|---|---|
|
Glass |
Tastes clean, easy to clean |
Can break easily |
|
Stainless Steel |
Strong, keeps drinks hot or cold, easy to clean |
Can feel plain sometimes |
|
Wood |
Classic feel, special look |
Needs more care, can soak up flavors |
|
Sustainable |
Good for the earth, helps people |
Not many choices, can be less strong |
You want a cup that fits your life and lets you show your style. The material you choose changes how you use your cup and how you can make it your own. Stainless steel keeps drinks hot and lets you engrave names. Ceramic gives you color and style. Wood connects you to old ways. Leather makes your cup feel fancy.
Note: Choose a material that works for you and lets you make your cup special.
Personalizing Yerba Mate Cups
You want your yerba mate cup to stand out. Personalization makes your cup feel special and shows your personality. You can turn a simple cup into a one-of-a-kind gift or a cool piece for your collection. Let’s look at some ways you can make your cup unique.
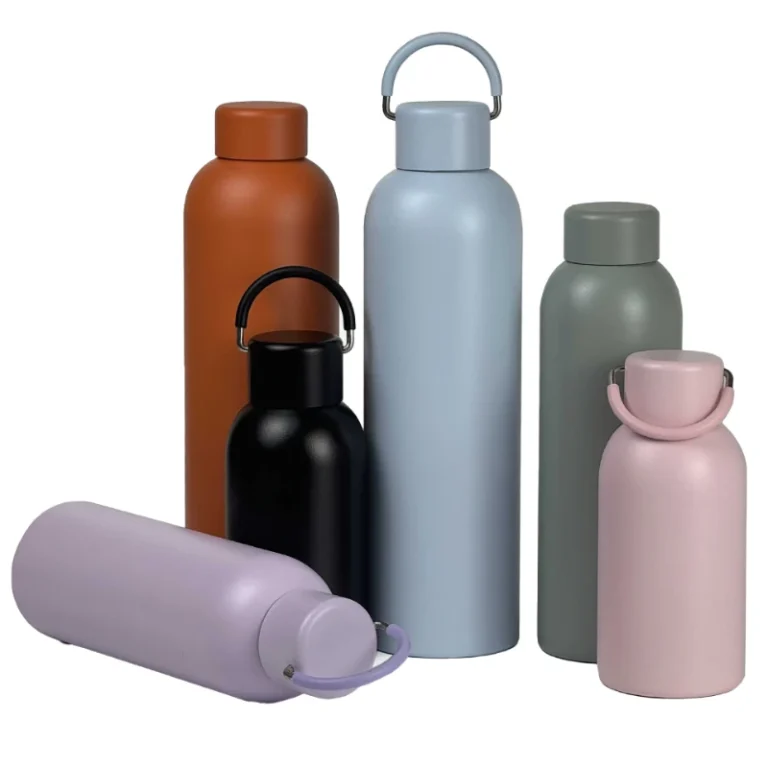
Colors and Patterns
Colors and patterns help you show your personality. You can pick bright colors if you like bold styles. Some people choose earth tones for a calm look. Patterns can be stripes, dots, or even nature designs. You might see cups with sun symbols or leaves. These designs make your cup feel lively and fun.
If you want to give personalized gifts, you can match the colors to the person’s favorite shades. You can also use patterns that remind them of their home or culture. Many shops offer engraved cups and mugs with custom patterns. This makes your gift feel thoughtful and unique.
Tip: Try mixing colors and patterns to create a cup that matches your mood or style.
Functional Customizations
Handles and Shapes
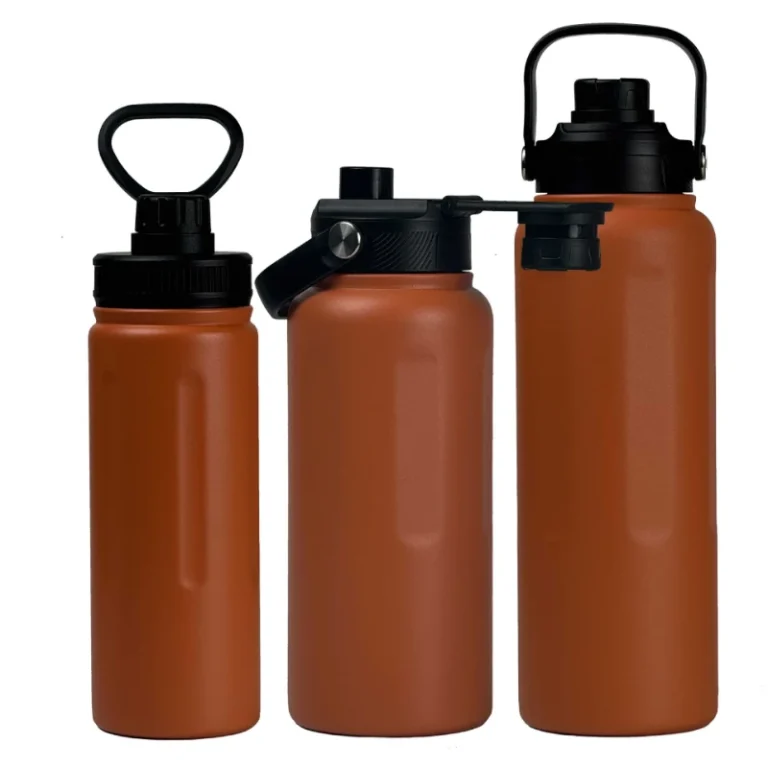
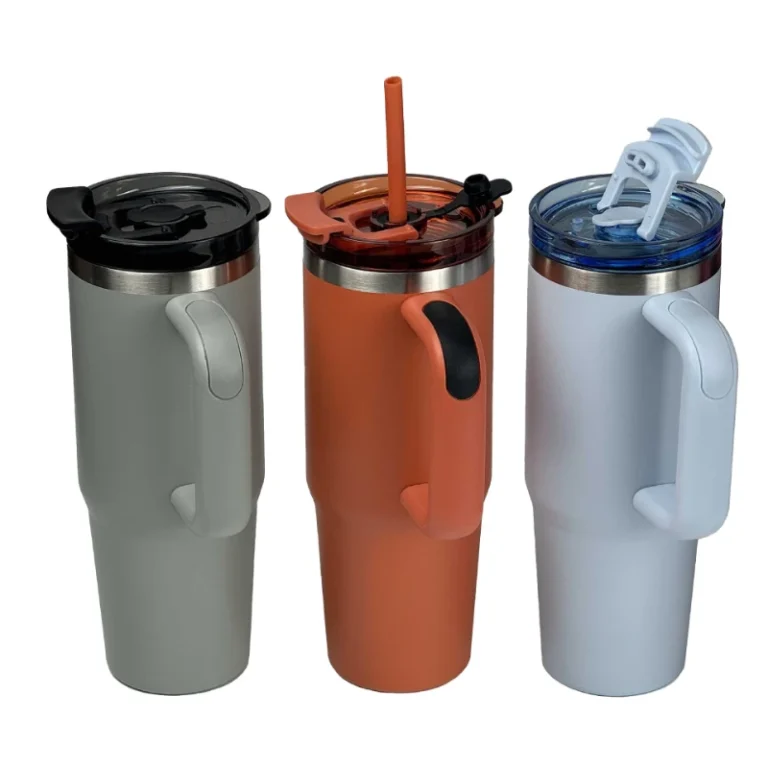
Functional customizations change how you use your cup. You can add a handle if you want to hold your cup easily. Some cups have wide bases so they don’t tip over. Others have a narrow shape for a better grip. You can pick a shape that fits your hand or your style.
Handles help if you drink hot mate. You won’t burn your fingers. Some cups have double walls to keep drinks warm. These changes make your cup more useful and comfortable. If you want to give gifts, you can choose shapes that match the person’s needs.
Note: Think about how you use your cup every day. Choose functional customizations that make your cup easy to use.
Cultural and Personal Symbols
You can add symbols to show your roots or your personality. Many people use names that reflect where the cup comes from or who made it. You might see cups called calabash gourd or torpedo mate. Different countries use different words for their cups. In Argentina, people say Mate or Calabaza. In Uruguay, they use Mate or Porongo. In Brazil, you might hear Cuia.
You can also add unique patterns, carvings, or leather wrappings. Some people like custom engravings with their name or a special message. These touches make your cup feel personal and meaningful. If you want a one-of-a-kind gift, add a symbol that matters to the person.
-
Names reflecting origin, material, or artisan (like calabash gourd, torpedo mate)
-
Regional variations in terminology (Argentina: Mate, Calabaza; Uruguay: Mate, Porongo; Brazil: Cuia)
-
Unique patterns and personal touches (intricate carvings, leather wrappings, custom engravings)
Personalization lets you turn a simple cup into something that shows your personality. You can use colors, shapes, and symbols to make your cup special. These ideas help you create personalized gifts that people will love.
Laser Engraving Techniques
How Laser Engraving Works
A laser engraving machine can make a plain yerba mate cup look cool. It uses a strong light beam to mark or cut the surface. You can put your name, a logo, or a special design on your cup. Here is how the process goes:
-
First, you pick a design and send it to the laser engraving machine.
-
The machine uses either a CO2 laser or a fiber laser. CO2 lasers are best for glass. Fiber lasers work well for metal cups.
-
You set up the machine for the material and how deep you want the design.
-
The machine moves the laser over the cup and makes your design.
-
You can add names, logos, or cool patterns to your cup.
-
Safety is important. You need good air flow and safety gear when using the machine.
Tip: Check what your cup is made of before you start. This helps you choose the right laser and settings.
Machine Types and Settings
There are two main kinds of laser engraving machines. Each one works better for certain materials and gives different results.
CO2 vs Fiber Lasers
CO2 lasers and fiber lasers are used most for drinkware. CO2 lasers use a 10.6 micrometer wavelength. They are great for glass and make smooth edges. Fiber lasers use a 1.06 micrometer wavelength. They are fast and very exact, especially for metal cups. Sometimes, fiber lasers can also engrave some glass.
Here is a table to compare them:
|
Laser Type |
Wavelength |
Characteristics |
Typical Settings |
|---|---|---|---|
|
CO2 Lasers |
10.6 micrometers |
Good for glass, makes smooth and nice engravings. |
20% power, 300mm/s speed, 0.1mm interval |
|
Fiber Lasers |
1.06 micrometers |
Works for some glass, very exact and quick. |
Settings change for each project |
Adjusting for Material
You need to change the machine settings for each material. For metal cups, use a fiber laser and set it for high detail. For glass, use a CO2 laser. You can change the power, speed, and space between lines to get the look you want. If you want deep marks, use more power and go slower. For light marks, use less power and go faster.
Note: Test your settings on a practice piece first. This helps you avoid mistakes and get the best look.
A laser engraving machine helps your cup stand out. You get sharp lines, smooth edges, and cool designs. You can use it on glass or metal. With the right settings, your cup will look great and last a long time.
Safety Tips
You want your yerba mate cup to look amazing, but safety comes first when you use a laser. The laser can get very hot and powerful. If you do not follow safety steps, you might break your cup or hurt yourself. Here are some easy tips to help you stay safe during the engraving process.
-
Start with lower power settings. The laser can crack or shatter glass if you use too much power. Begin with a gentle setting and test on a sample piece.
-
Go slow for better results. If you move the laser too fast, your engraving might look uneven. Slow speeds help you get sharp and clear designs.
-
Check your material. Every cup is different. Adjust the laser settings for wood, metal, or glass. Glass needs special care because it can break easily.
-
Clean the lens and keep air moving. Dust can block the laser beam. Clean the lens often and make sure your workspace has good ventilation.
-
Use a supportive backing. Place a soft material under glass cups. This absorbs the laser energy and keeps your cup safe from cracks.
-
Lower power and increase speed for thin glass. Thin glass is fragile. Use less power and move the laser faster to avoid damage.
-
Pick lighter designs. High-contrast patterns can stress thin glass. Choose softer designs to keep your cup safe.
-
Watch the process closely. Stay near the laser while it works. If you see smoke, cracks, or strange sounds, stop right away.
Tip: Always wear safety goggles when you use a laser. Protect your eyes from the bright beam.
Here is a quick table to help you remember these safety steps:
|
Safety Step |
Why It Matters |
|---|---|
|
Start with lower power |
Prevents cracking or shattering |
|
Go slow |
Gives precise and clear results |
|
Adjust for material |
Keeps each cup safe |
|
Clean lens and ventilate |
Maintains laser quality |
|
Support backing |
Protects delicate glass |
|
Lower power, higher speed |
Minimizes risk for thin glass |
|
Lighter designs |
Reduces stress on fragile cups |
|
Monitor closely |
Catches problems early |
You can make your cup look great with a laser, but you need to stay safe. Take your time, check your settings, and keep your workspace clean. If you follow these tips, you will enjoy the engraving process and avoid accidents.
Other Customization Methods
Screen Printing
Screen printing is a classic way to customize yerba mate cups. You might see this method used for logos, slogans, or bold patterns. It works by pushing ink through a mesh screen onto the cup. This process creates sharp and repeatable results. If you want to order a lot of cups, screen printing saves money and keeps the quality high. Here’s why many people choose it:
-
Screen printing is cost-effective for bulk orders.
-
You get sharp and consistent designs every time.
-
It works well for simple graphics and solid colors.
-
Factories use safe inks and follow strict rules, so your cups are ready for retail.
Other methods, like heat transfer or hydrographic printing, can handle more complex designs. However, they usually cost more if you need a large batch. Laser engraving gives a premium look and lasts a long time, but it can be pricier than screen printing. If you want to brand your cups for a business or event, screen printing is a smart choice.
UV Printing
UV printing uses ultraviolet light to dry the ink right after it hits the cup. This method gives you bright colors and detailed images. You can print photos, gradients, or even tiny text. UV printing works on many surfaces, including metal, glass, and some plastics. If you want a custom cup with lots of detail, this method is a great pick.
Here’s a quick look at the pros and cons:
|
Advantages |
Disadvantages |
|---|---|
|
High-Resolution Printing |
Lower Efficiency on Mass Printing |
|
Fast Drying Process |
More expensive for bulk orders |
|
Works on Diverse Surfaces |
Not as effective on textiles |
|
Eco-Friendly Option |
Limited to flat or slightly curved surfaces |
|
Perfect for Short Runs & Customization |
|
You might choose UV printing for small batches or special gifts. It’s eco-friendly and gives you lots of creative freedom. If you want to add a laser-engraved logo on top, you can combine both methods for a unique effect.
Embossing and Pad Printing
Embossing makes your design stand out by raising it above the surface. You can feel the pattern with your fingers. This method works best on leather or thick materials. It adds a touch of class to your yerba mate cup. Pad printing uses a soft pad to transfer ink onto curved or uneven surfaces. It’s perfect for small logos or detailed artwork.
You can mix embossing with laser engraving for a cup that feels and looks special. Pad printing also pairs well with laser for multi-color designs. If you want a cup that stands out, try combining these methods. You’ll get a product that feels custom-made and high-quality.
Tip: Try different methods to find the style that fits you best. You can mix screen printing, UV printing, and laser engraving for endless options.
Method Comparison
You might wonder which customization method works best for your yerba mate cup. Each technique has its own strengths. Let’s break down the main differences so you can pick the right one for your project.
Here’s a quick look at what makes each method unique:
-
Screen Printing: This method shines when you need a lot of cups. It keeps costs low for big orders. You get bold colors and sharp lines. It works well on glazed ceramic mugs and other smooth surfaces. After you pay for the setup, each cup costs less.
-
UV Printing: Want bright, detailed images? UV printing gives you high-resolution graphics that last. You can use it on many materials, like metal, glass, or plastic. You don’t need special coatings. The prints stay strong and resist fading.
-
Pad Printing: This method is perfect for small logos or designs on curved surfaces. You get crisp colors and fine details. It’s not the best for large artwork, but it handles tricky shapes with ease.
-
Embossing: Embossing makes your design pop out from the cup. You can feel the raised pattern with your fingers. It adds a fancy touch, especially on leather or thick materials. It works best for simple shapes or logos.
Let’s compare these methods side by side:
|
Method |
Best For |
Surface Types |
Design Detail |
Cost for Small Orders |
Durability |
|---|---|---|---|---|---|
|
Screen Printing |
Large batches, bold logos |
Flat, glazed, ceramic |
Simple, solid colors |
Low after setup |
Good |
|
UV Printing |
Photos, detailed art |
Most materials |
High-resolution |
Higher |
Excellent |
|
Pad Printing |
Small logos, curves |
Curved, uneven |
Sharp, small |
Moderate |
Good |
|
Embossing |
Tactile, luxury feel |
Leather, thick cups |
Simple, raised |
Higher |
Excellent |
Tip: If you want to save money on a big order, go with screen printing. For a one-of-a-kind gift, try UV printing or embossing.
You don’t have to stick with just one method. You can mix techniques for a unique look. For example, you can use UV printing for a colorful design and add laser engraving for a personal touch. Think about your budget, the look you want, and how many cups you need. This will help you choose the best way to customize your yerba mate cup.
If you want something bold and classic, screen printing is a solid choice. For bright colors and fine details, UV printing stands out. Pad printing helps with tricky shapes. Embossing adds a special feel. Pick the method that matches your style and needs. Your cup will look amazing!
Packaging Tips for Customized Drinkware
Packaging Types
When you make yerba mate cups special, the packaging is important too. You want your cup to get to you safely and look nice. There are different types of packaging you can pick.
Basic and Gift Packaging
Basic packaging keeps your cup safe when it ships. You might see cardboard boxes, bubble wrap, or paper sleeves. These things stop your cup from getting scratched or bumped. If you send cups for a business or party, basic packaging is good and not expensive.
Gift packaging is fancier. You can use pretty boxes, velvet bags, or bags with your own design. These make your cup feel special and ready to give as a gift. You might add a ribbon or a thank-you note. Gift packaging makes your cup a cool present.
Here’s a table that shows some packaging types and what is good or bad about them:
|
Type of Cup |
Advantages |
Limitations |
|---|---|---|
|
Paper Cups |
Break down easily, light, strong shape, good for one use |
Some have plastic, not always recycled, don’t keep heat well |
|
Plastic Cups |
Last a long time, hold drinks well, can use again |
Not good for earth, make more pollution, can smell |
|
Bamboo Fiber Cups |
Good for earth, keep drinks warm, break down in dirt |
Heavier, cost more, harder to find |
|
Foil-Lined Cups |
Keep drinks hot, stop leaks, better for earth |
Harder to recycle, cost more to make |
You can pick the packaging that fits what you need. If you want something easy, use basic packaging. If you want to wow someone, pick gift packaging.
Eco-Friendly Options
Eco-friendly packaging is smart if you want to help the planet. You can use boxes made from old paper, compostable boxes, or bamboo fiber cups. These choices show you care about nature and make less trash. Lots of people like brands that use green packaging.
Here’s what happens when you pick eco-friendly packaging:
-
People see you care about the earth.
-
Your brand gets fans who like green products.
-
You get loyal customers who tell their friends.
If you have a business, green packaging makes people think better of you. People remember brands that help the planet. You make your cups stand out and help nature too.
Branding and Presentation
Branding and presentation make your cups look cool and professional. You want your packaging to match your style and message. You can put your logo on it, pick colors that fit your brand, or use shiny finishes.
Here are some ways to make your packaging stand out:
|
Strategy Category |
Key Considerations |
|---|---|
|
Functionality |
Make sure your cup is easy to use, keeps drinks hot or cold, and is simple to clean. |
|
Aesthetic Appeal |
Use colors, shapes, and logos to catch people’s eyes. |
|
Ease of Customization |
Pick packaging that lets you add designs or printing. |
|
Branding Purpose |
Match your cup to your goal, like gifts or giveaways. |
|
Budget Constraints |
Pick packaging that looks good and lasts, but doesn’t cost too much. |
These ideas help your cups look great in stores or online. Good branding makes people notice your cup. Nice packaging makes people happy to open it.
Including Care Instructions
Care instructions help people keep their cups nice. You can add a card or sticker with cleaning tips. Tell people how to wash the cup, what is safe, and how to keep it from breaking.
Here are some care tips you can share:
-
Wash by hand if the cup is wood or leather.
-
Don’t use dishwashers for cups that are easy to break.
-
Use gentle soap and a soft cloth.
-
Dry the cup after you clean it.
Adding care instructions shows you care about your customers. You help them use their cup longer and avoid problems. It’s an easy way to make your packaging better.
Tip: Always put care instructions with your cups. People like the extra help and feel good using their new cup.
Packaging MOQ and Costs
When you start customizing yerba mate cups, you might think only about the cup itself. Packaging plays a big role in your project’s success. You need to know about packaging minimum order quantities (MOQs) and how they affect your budget.
Packaging MOQ means the smallest number of boxes or bags you can order from a supplier. Some companies let you order as few as 20 or 50 pieces. Others want you to buy 500 or even 5,000 at a time. Your choice depends on your goals and how many cups you want to sell or give away.
Here’s how packaging MOQ and costs can shape your project:
-
Lower MOQs (like 20–100 pieces) work well for small shops or if you want to test a new design. You don’t need to spend a lot of money up front or store extra boxes.
-
Higher MOQs (500–5,000+ pieces) help you save money on each package. If you plan to sell a lot of cups, buying in bulk lowers the price per box.
-
You need to think about more than just the price of each package. Shipping, storage, and import taxes also add to your total cost.
Tip: Always ask your supplier about the MOQ for both cups and packaging. This helps you avoid surprises and plan your budget.
Let’s look at a simple table to compare how MOQ changes your costs:
|
Order Size |
Typical MOQ |
Cost Per Package |
Best For |
|---|---|---|---|
|
Small Batch |
20–100 |
Higher |
Gift shops, small events |
|
Medium Batch |
100–500 |
Medium |
Local brands, boutiques |
|
Large Batch |
500–5,000+ |
Lower |
Big stores, bulk sales |
If you order a small batch, you pay more for each package. You get flexibility and don’t need much storage. If you order a large batch, you pay less per package, but you need more space and a bigger budget up front.
Don’t forget about extra costs. Shipping heavy boxes can get expensive. Import duties and taxes might surprise you if you order from another country. Always ask for a full quote that includes all fees.
Here are a few ways to manage packaging costs:
-
Choose standard packaging sizes. Custom shapes or colors cost more.
-
Ask about eco-friendly options. Sometimes recycled boxes cost less if you buy in bulk.
-
Combine your cup and packaging orders with friends or other small brands to reach a better price.
Note: Smart planning helps you get the best deal and keeps your project on track.
When you understand packaging MOQ and costs, you can make better choices. You’ll know how much to order, how much to spend, and how to keep your project stress-free. That way, your yerba mate cups look great and fit your budget.
Customization Workflow Overview
Design and Sample Approval
You start your yerba mate cup project with a clear idea. First, you talk with the supplier about what you want. You share your packaging expectations and explain your vision. The supplier checks if your ideas are possible. This step helps you avoid surprises later.
Next, you move to the design phase. You can create your own design or ask the supplier for help. Some suppliers offer templates or examples. You pick colors, patterns, and symbols that fit your style. You decide how you want your cup to look and feel.
After you finish your design, the supplier makes a sample. This sample shows you what the final cup will look like. You check the sample for quality and details. If something is not right, you ask for changes. The supplier can refine the sample until you are happy. You approve the sample before mass production starts.
Here’s a simple table that shows the first steps in the customization workflow:
|
Step |
Description |
|---|---|
|
Clarification |
You explain your packaging needs and the supplier checks if your ideas work. |
|
Design & Proposal |
You create your design or use the supplier’s help to make it fit your vision. |
|
Sampling & Refinement |
The supplier makes a sample. You check it and ask for changes if needed. |
Tip: Always ask for a sample before you order a large batch. This helps you spot problems early and get the cup you want.
You make your cup unique by starting with a strong design and checking the sample carefully. This process gives you confidence and helps you get the best results.
Timeline Reference
You probably want to know how long it takes to customize yerba mate cups. The timeline can change based on your choices, but you can plan better if you know the usual steps. Let’s break it down so you can see what to expect.
Here’s a sample timeline for a typical customization project:
|
Step |
Estimated Time |
What Happens Here |
|---|---|---|
|
Design & Sample Approval |
1–2 weeks |
You share your ideas, review samples, and approve the final design. |
|
Production |
2–4 weeks |
The factory makes your cups and checks quality. |
|
Packaging |
1 week |
Your cups get packed for shipping or gifting. |
|
Final Inspection & Delivery |
1–2 weeks |
The supplier checks everything and ships your order. |
You can finish a small batch in about 4–6 weeks. Bigger orders or special designs might take longer. If you want custom packaging or extra features, add a week or two.
Tip: Ask your supplier for a timeline before you start. This helps you plan for events, gifts, or sales.
Sometimes, things move faster. If you use standard designs or digital printing, you can cut the timeline by a week. If you need a rush order, some suppliers offer express production for an extra fee.
Here are a few things that can change your timeline:
-
Material Choice: Stainless steel cups usually take less time than wood or ceramic.
-
Customization Method: Laser engraving is quick. Hand painting or embossing takes longer.
-
Packaging Type: Basic packaging is fast. Gift boxes or eco-friendly options need more time.
-
Order Size: Small batches ship faster. Large orders need more checks and packing.
You can speed things up by preparing your design early. If you approve samples quickly, production starts sooner. Clear communication with your supplier keeps things moving.
Note: If you need your cups for a holiday or event, start your project early. Give yourself extra time for changes or shipping delays.
Here’s a quick checklist to help you stay on track:
-
Share your design ideas right away.
-
Approve samples as soon as possible.
-
Pick standard materials and packaging if you want a faster timeline.
-
Ask for updates from your supplier every week.
⏰ Planning ahead makes your customization project smooth and stress-free. You’ll know when to expect your cups and can get ready for your big day!
Cost and Budget Planning
When you start customizing yerba mate cups, you want to know how much everything will cost. Planning your budget helps you avoid surprises and keeps your project on track. Let’s break down the costs and see how you can budget for both small and large orders.
Cost Breakdown
You pay for more than just the cup. Each step in the process adds to the total price. Here’s what you should look out for:
-
Base Cup Price: This is the cost of each blank cup. Stainless steel usually costs more than plastic or ceramic.
-
Customization Fees: Laser engraving, printing, or embossing add extra charges. More colors or complex designs can increase the price.
-
Setup Fees: Some factories charge a one-time fee to set up machines or create custom molds.
-
Packaging: Basic packaging costs less. Gift boxes or eco-friendly options cost more.
-
Shipping: The size and weight of your order affect shipping costs. International shipping can add a lot.
-
Taxes and Duties: If you order from another country, you might pay import taxes.
Here’s a simple table to help you see where your money goes:
|
Cost Item |
Typical Range (per cup) |
|---|---|
|
Base Cup |
$2 – $8 |
|
Customization |
$1 – $5 |
|
Setup Fee |
$30 – $100 (one-time) |
|
Packaging |
$0.50 – $3 |
|
Shipping |
$0.50 – $4 |
|
Taxes/Duties |
Varies |
Tip: Always ask your supplier for a full quote. This helps you see all the costs before you order.
Budgeting for Small and Large Orders
Your budget changes based on how many cups you want. Small orders cost more per cup, but you spend less overall. Large orders give you a lower price per cup, but you need more money up front.
For Small Orders:
-
You can test your design without spending a lot.
-
Digital printing or standard designs help you avoid high setup fees.
-
Expect to pay more per cup, but you don’t need to store extra cups.
For Large Orders:
-
You get discounts when you order more.
-
Setup fees spread out over many cups, so each cup costs less.
-
You need space to store your cups and packaging.
Here’s a quick comparison:
|
Order Size |
Upfront Cost |
Cost Per Cup |
Best For |
|---|---|---|---|
|
Small (25-100) |
Low |
Higher |
Gifts, samples, small shops |
|
Large (500+) |
High |
Lower |
Big events, retail, bulk sales |
Note: Start small if you want to test your idea. Go big when you’re ready to grow your brand.
You can save money by choosing standard materials, simple designs, and basic packaging. Always plan for extra costs like shipping and taxes. Careful budgeting helps you get the best value and makes your yerba mate cup project a success!
You now know how to make yerba mate cups your own. You learned about MOQ, materials, and packaging. Are you excited to begin your project? Follow these easy steps:
-
Talk to a supplier and ask for a sample.
-
Make your design and pick how you want to customize.
-
Pick packaging that matches your style.
Tip: Custom drinkware is a great gift. It also helps your brand get noticed. Start now and make something special!
FAQ
What does MOQ mean for custom yerba mate cups?
MOQ stands for Minimum Order Quantity. You need to order at least this number of cups from a supplier. It helps factories cover setup costs and keeps prices fair.
Can I order just one customized cup?
Yes, you can! Some suppliers offer digital printing or standard designs with no minimum order. You get to test your idea before buying more.
Which material works best for laser engraving?
Stainless steel gives you sharp, clear engravings. Wood and ceramic also work well. Always check with your supplier to see which materials they recommend.
How long does the customization process take?
Most projects finish in 4–6 weeks. You approve the design, then production and packaging happen. If you need your cups faster, ask about rush options.
What’s the safest way to clean a custom yerba mate cup?
Hand wash your cup with mild soap and a soft cloth. Avoid dishwashers for wood or leather cups. Dry your cup right away to keep it looking new.
Can I use eco-friendly packaging for my cups?
Absolutely! You can choose recycled boxes, compostable bags, or bamboo fiber packaging. Eco-friendly options help your brand stand out and protect the planet.
How do I add my logo or artwork to the cup?
You send your logo or artwork to the supplier. They use laser engraving, screen printing, or UV printing to put your design on the cup. Ask for a sample first.
What if I want to change my design after seeing the sample?
You can request changes after reviewing the sample. The supplier will update your design and send a new sample. This step helps you get the perfect cup.
